Friday 29 November 2013

Malta Convoy - August 12, 1942 - 2000 hours

Malta Convoy - August 12, 1942 - 2000 hours

"Radio silence and lights off people. We are approaching known Axis infested waters" - on board MV Melbourne Star

As Operation Pedestal continues it's mission with 15 merchant ships still intact, the Royal Navy pressed on and by now entered the Strait of Sicily.
Regia Marina's Montecuccolo CLAA. From right to left - Muzio Attindolo, Raimundo Montecuccoli and Emanuele Filiberto
Note house rules: 2000 hours constitute as a night battle. Attributing to that, no air strike was allowed. The range for spot and detection suffer a 50% penalty. A ship may remain undetected even if it's mere centimeters away from an enemy warship.

"Submarines! Submarines! 12 degrees starboard" - HMS Foresight on successful detecting Regia Marina submarines
 
With Regia Marina submarine detected, Royal Navy were able to deter an underwater assault before they could lay waste to the convoy.
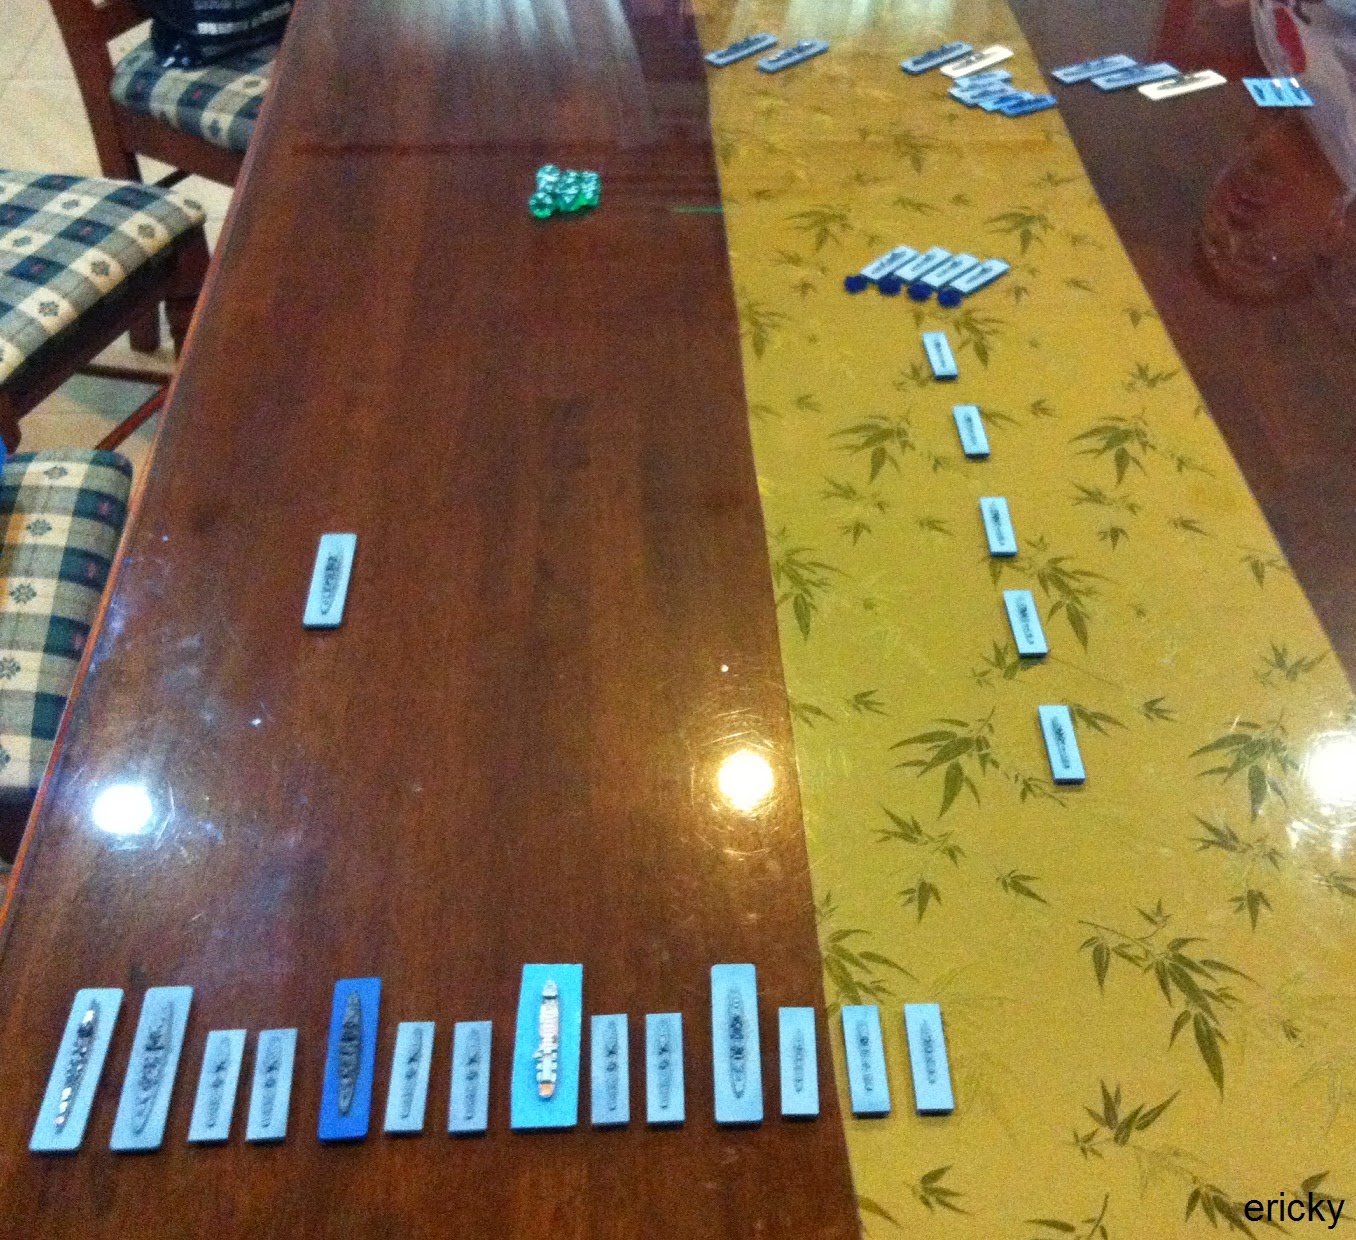
Battle formation
As both fleets enter the battle area, the night battle proved to be a difficult situation. Both fleets had to deal with the 50% penalty on spot and detection, making it easier for warships close down and be within mere point blank range and still remain undetected.

"Captain, enemy warship....enemy warship!!" - Moments before HMS Bicester was destroyed

The Regia Marina deployed all available warships at their disposal, a fearsome sight, to stop the advancing Royal Navy.

Turn 2
On the other hand, the Royal Navy deployed their Hunt Class destroyers with HMS Ashanti in the lead as covering ships, while, HMS Cairo on the left flank, in front of the advancing merchant ships.
 
At turn 2, with HMS Bicester spotted my Regia Marina, it soon met it's demised. With that however, it enable Royal Navy warship to detect the Regia Marina but only able to return fire and the next turn.
 
Note house rule: Italian Fleet tentativeness: The Regia Marina built excellent ships in the 30s and 40s and manned them with capable and brave crews. These ships and their crews were poorly served by the Italian Naval leadership who were reluctant to suffer losses. If the Italian navy sorties, a ship that suffers ANY damage from air or submarine attack will return to port immediately. If the Italian navy engages in a surface action, once a ship has marked off 33% (rounded up) of hull point damage, it is treated as a crippled ship, and must withdraw from the action
Turn 3
"Starboard turn, ready those torpedoes" - on board HMS Pen

Royal Navy destroyer warships were able to plot their way just mere inches off the Regia Marina, catching them off guard at turn 3.  5 torpedoes launches were made by the Royal Navy during that turn.
 
With the hope of remaining undetected and to deal silent blows to the Regia Marina became a futile attempt as the Royal Navy approaching destroyers were spotted one after another.

At turn 3 - HMS Ashanti, HMS Branham, HMS Derwent and HMS Pathfinder - were subsequently destroyed by the Regia Marina, dealing a cruel blow to the Operation.

At the Italian side: cruiser Bolzana and destroyers Ascari and Freccia, were forced to return port attributing to substantial damaged received from gun fire

Cruiser Gorizia was the only warship damaged by the Royal Navy's torpedoes which forced her to call port and left the battle.
Turn 4
"Brace yourself boys." - MV Clan Ferguson.

With the remaining destroyer, HMS Fury, screening the main battle line, the merchant ships continued their advancement, hopefully to remain undetected
 
Regia Marina warships by now had split into 2 distinctive flanks and will subsequently converge to attempt encircling the approaching merchant ships, somewhere out there.
 
By turn 4, HMS Fury succumb from the multiple gun fire coming from Regia Marina.
Turn 5
 "They are everywhere, we are surrounded" - MV Brisbane Star

With HMS Cairo the only warship left, the Regia Marine pressed on their offensive and it's within spotting against the merchant vessels, with no sooner scoring for the Axis their first merchant vessel kill.
 
With what left of the Royal Navy, HMS Cairo scored a critical ammo damage on Muzia Attendolo light cruiser; rupturing it's ready ammo loud.
Turn 6
"Ram 'em down!!" - MV Empire Hope steering forward.
 
HMS Cairo continued its maneuver around the Regia Marina while scoring several hits.
 
The situation along the merchant vessel line became so critical that MV Empire Hope steered it's vessel right into the cruiser Emanuele Filiberto Duca D'Aosta; puncturing its hull causing it to flood profusely and finally sinking it.

By this time, the Regia Marina had scored another kill, claiming MV Clan Ferguson, while sinking SS Almeria Lykes with 3 torpedo hits.
Turn 7
"Hold on right boys." - MV Glenorchy on ramming destroyer Fuciliere
 
Another merchant vessel ramming exercise saw the sinking of the destroyer Fuciliere while another Regia Marina's cruiser, Trieste, returned to port after taking considerable damage from HMS Cairo.
 
By turn 7, the hopes of Royal Navy victory soon faded as timely torpedo shots finally sunk HMS Cairo while another brought down MV Glenorchy
Turn 8
"Continue pushing on, reinforcement in on their way" - SS Santa Elisa to the remaining merchant vessels.
Turn 9
The reinforcement never came; the last contact made was with MV Wairangi, right before her sinking.
 
Regia Marina will claim 5 more kills before capturing 3 merchant vessels. Operation Pedestal came to an end on 2045 hours - August 12, 1942, with an Axis victory.

The results as follows:
Combined axis air and naval power stopped the Malta Convoy carrying precious fuel, ammunition and supplies to the besieged island of Malta. With over 75% casualties suffered on both sides however, the Mediterranean theater ceased to be a hotspot for naval activities as both sides took a deep breath to re-assess their available strength.

Without the fuel required, Malta air and naval power ceased to be a threat to Axis convoys carrying essential supplies to the German and Italian army in North Africa. Interestingly and historically, the Allied victory during the 2nd Battle of El-Alamein which happened on 23 October–11 November 1942, was partially attributed to Malta stopping 35% of Axis shipping and removing oilers carrying fuel for Rommel's Panzers.

However, due to the failure of Operation Pedestal, Malta surrendered 2 weeks after. The build up of Axis forces were faster than the British thereafter. With the Battle of Alam el Halfa just looming around the corner of August 30th 1942, Rommel can once again reinforce his army with badly-needed supplies. The British 8th Army's fate hangs in balance as the Desert Fox prepares to deal another blow to the already shaken British morale.

Would the British 8th Army persevere? Find out in the next Mini Hypothetical Campaign in 2014, Western Desert Campaign: Battle of Alam el Halfa

Thursday 7 November 2013

Malta Convoy - August 12, 1942 - 0800 hours to 1400 hours

“The sound of sirens keeps going on. The Axis air strikes were relentless, pounding us every hour as the convoy continues its advancement toward Malta. Oh when will this nightmare ends.” - Petty officer aboard HMS Icarus, part of Force X

As the convoy continues its journey towards relieving Malta, Axis air strikes provided some action along the way. Every single interval box, Axis air were present keeping the Royal Navy entertained.

Note house rules: Attributing to difference in Axis air strike type and grouping, total Force's AA value were divided, as per player choice.
 
Anticipating an air raid on Force Z, the Royal Navy woke up to a surprise. At 0800 hours, Axis air power flew past Force Z and stroked Force X instead. With minimal CAP presence, the air superiority favors the Axis.

HMS Cairo was the only casualty from this strike after being strike by German air bombers causing uncontrollable flooding and subsequently meeting it's demised.

“Direct all fighters to Force X.” - HMS Indomitable

With whatever fighters left available, the Royal Navy managed to assemble 2 CAP above Force X. This proved inadequate as the Axis air power were far numerous and far superior - taking down all Royal Navy's fighters in quick succession.

1100 hours on that day, Force X flagship, HMS Kenya was squarely hit by Italian level bomber and sunk to the abyss. Subsequent command checks showed no warship left play, attributing to Royal Navy’s proud naval tradition. From then on, HMS Nigeria assumed command of Force X.

“Focus fire lads!! Bring those planes down!!” – Officer on board HMS Nelson

At 1400 hours and having no fighters available, the Axis air power raided Force Z. With a total of 37 AA guns still proved insufficient as the Italian level bombers once again finding its mark and resulting in a hit to HMS Rodney – saved by its massive hull points.

“Admiral YS Oon, we had successfully delivered the much needed planes to Malta and it’s up your Force X to carry out the rest of the journey in relieving Malta. We are needed up north, I bade you farewell.” – Admiral Eric Lew, commanding officer of Force Z, on returning to Gibraltar.

By 1400 hours, Force Z had successfully delivered the much needed planes to Malta, the journey cut short as the entire Force are required to return to port for its next expedition up north.

“Enemy surface ship spotted at the horizon” – yelled a petty office
“Hostile submarine detected!!” – yelled another

Kreigsmarine setup
As 1700 hours approached, the Kreigsmarine surface warships were detected within striking distance coupled with 5 known Regia Marina submarines patrolling the same waters. On the other hand, Force X was escorted by 5 submarines bearing the Royal Navy – which soon erupted in combined arms warfare.
 
Royal Navy setup
The Royal Navy submarines drew first blood as they managed to sink one Italian submarine, still insufficient as the Italians torpedoes managed to record a hit on HMS Manchester, thankfully, it did not breach the hull.

A non-penetration hit by Royal Navy submarine was achieved on the Scharnhorst.

“All ships stern ahead” – Admiral YS Oon

Turn 1
With only 4 Kreigsmarine warships available, Force X plotted their way ahead and soon both fleets met head on.

At turn 1, with the Royal Navy warships on focus fire, both Z4 and Z5 destroyers were destroyed in quick succession. Minor damages were recorded in return.

As both fleets were in striking distance from one another, this provides a great platform for Scharnhorst to once again demonstrate its superior fire power.

“Incoming torpedoes!!” – Onboard HMS Penn

Turn 2
HMS Penn was within torpedo distance from Z6 destroyer which took almost no time to be fired upon by torpedoes. Both warship will meet their demised in turn 2, firing at each other.

Scharnhorst, despite the distance, managed to find its mark caused HMS Manchester to take in water. This will plague HMS Manchester the entire surface encounter and will force it to leave the battle area by turn 4. Attributing to the heavy damaged sustained and persistent flooding, HMS Manchester was called to port.

“We have it surrounded. It will not escape” – HMS Icarus reporting

Turn 3
With none of its escorts remained in battle, Scharnhorst was left to fend for itself. However, she will not go down without a fight. Her powerful guns tore into HMS Nigeria, which sparked uncontrollable fire on board, and her torpedoes sent HMS Icarus to the abyss.

Scharnhorst continues to soldier on, despite herself taking a torpedo hit which caused severe damaged to the engine room.

“What is that ship made out off?” – Officer aboard HMS Interpid exclaimed.

Turn 4
Despite taking severe pounding from the Royal Navy warships, Scharnhorst continues to defy destruction. Having surrounded virtually by all corners, she bored all its guns.

"What should we do Mein Herr? Should I order a withdrawal?" The deck seems to be a little chaotic as all officers started to ask the next course of action, however Admiral Hyiktsay, still peeking thru the telescope, looking toward the far edge as if he is hoping for something, something miracle to arrive.

All these were suddenly interrupted, "Another enemy destroyer is hit!" everyone cheered except the officers, they knew that their doom is coming soon.

Ever so poised, Admiral Hyiktsay turned towards his officers, "Continue pursue HMS Nigeria, starboard 30 and full speed” – followed by main canons roar.

Turn 4 - Scharnhorst surrounded
It will take 3 torpedo hits to finally sink the Scharnhorst, long enough for her main guns to seek utter destruction of Force X.

Before she succumbs, Scharnhorst main guns ripped apart HMS Nigeria, HMS Interpid and HMS Ledbury – sending all 3 ships and its crew to the bottom.

Convoy merchant ship

Sunday 8 September 2013

Malta Convoy - August 12, 1942 - 0500 hours


Malta Convoy - 12 August 1942, 0500 hours

"At dawn, jolted by the sound of sirens. Enemy planes spotted, yelled another. And indeed, it will be a long day." - Excerpts from a journal found on-board HMS Nelson.

After a successful defense from Axis air raids the evening before, their will to stop the convoy from resupplying Malta resumes.

For this round, the Axis air asset consist of 5 dive bombers and 7 level bombers attributing from the Kreigsmarine along with 2 waves of Italian planes involving 2 torpedo bombers and 5 level bombers. All escorted by 1 flight of CAP.

Note house rules: Attributing to difference in Axis air strike type and grouping, total Force Z's AA value were divided, as per player choice.

"I want those bombers up there 10 minutes ago!!" - Aboard HMS Victorious.

Axis surface ships were detected and it’s within the operational range of Force Z. All level bombers available from Force Z’s aircraft carriers were launched; escorted with a flight CAP.

"Re-direct all planes to Gibraltar." - HMS Eagle upon the destruction of its flight deck.

Despite having CAP presence above Force Z and coupled with numerous AA guns at their disposal; it proved insufficient to deter Axis level bombers from scoring hits to all 3 aircraft carriers. No hits recorded for other ships present.

HMS Victorious and HMS Eagle were squarely hit by the Axis level bombers; resulting bombing run damages the all important flight deck; effectively putting both aircraft carriers out of flying action.

HMS Indomitable, however, registered a non-penetration hit by the level bombers. Subsequent to that, they were hit by Axis torpedo bombers; in which resulted the ship to catch on fire. This was quickly extinguished by the well trained crew.

"That must have hurt!!" - excerpts from Royal Navy's torpedo bomber.

All available torpedo bombers from Force Z aircraft carriers managed to inflict a significant blow to the Kreigsmarine surface fleet; registering hits and successfully destruction of both Z10 and Z15 destroyers.

Scharnhorst was also not spared by the torpedo bombers, recording a penetration hit and subsequently caused flooding. Damage control checked on-board managed to contain it.
The setup
"They are there, somewhere, just can't see it Chief. It's just too dark" - reported a seaman on-board HMS Quentin.

Note house rules: Attributing to dawn battle, the first 2 turns were conducted as though its a night battle, at turn 3 onward, day battle. Spot & detection applies.
Force Z moving forward
"What is that? Up there?" - Right before the sinking of HMS Westcott.

The first 2 surface turns been a quiet affair and having all ships in Force Z moving forward, Scharnhorst's reconnaissance plane spotted HMS Westcott at turn 3, and took almost no effort in sinking it. 

Attributing to that, all remaining war ships in Force Z were able to spot Scharnhorst, however, they were only able to return fire at turn 4; proved to be costly.
Force Z continuous advancement while Kreigsmarine plotted across from their starting position
Force Z was unable to spot any Kreigsmarine surface warships mainly due to lack of reconnaissance planes available. They were able to spot them, only when both fleets reaches the minimum threshold of view range - 20 inches.

"All ships continue advancing. The enemy is not going to escape." - Ordered the Admiral Eric Lew on-board HMS Rodney.

Scharnhorst continues its destruction, taking out HMS Wilton, while she and her escorts continued to plot their way out of battle area.
Kreigsmarine about to make an exit
The head strong forward march by Force Z proved ineffective as Scharnhorst once again claimed its next victim, HMS Zetland, at turn 5.
Final action of the phrase
Force Z, on the other hand, managed to lay waste on Kreigsmarine light cruiser Emden, also in turn 5, with shots coming from HMS Nelson.'

"Alright boys, call off the chase." - Admiral Eric Lew

By turn 6, Kreigsmarine had left the battle area, and thus end the surface action and thus end for this phrase.

Rear Admiral Hyiktsay was once again mobbed by the press and this time, the concerned press asked for the fate of the Kriegsmarine Commerce Raider group, who coincidentally is down to just the Scharnhorst - "Is that true? Is the end of Germany?"

The enemy only manages to hit our weakest state ship, BUT, where we took 3 of their healthiest ship without a fight. Bear in mind, their 2 main aircraft carriers were disabled thanks to our ever furious Luftwaffe, and our Italian compatriot Even with Scharnhorst alone, they still will face the furious of Valderland itself!!

HEIL HITLER!!!


Dave was not available for the game attributing to “important operation”.